Step-by-Step Guide to Running the simple education Chatbot
The education chatbot offers a basic example of a chatbot structure that operates without relying on a database or tools. For more complex examples, refer to the airline example.
Step 1 - Understand the input
The examples/education/input folder contains the following structure:
education/
└── input/
    └── wiki.md                       # Prompt for the education agent
The folder contains only a path to the chatbot prompt.
Step 2 - Configure the Simulator Run Parameters
The only parameter that should be updated in the configuration file is the path to the prompt file. The parameters in the configuration files have already been updated as follows in the config/config_education.yml file:
environment:
    prompt_path: 'examples/education/input/wiki.md'  # Path to your agent's wiki/documentation
If you also want to modify the LLMs used by either the simulator or the chatbot, you should add the following lines to the configuration file:
To change the default LLM provider or model for either the IntellAgent system or the chatbot, you can easily update the configuration file config/config_edcation.yml. For example adding:
llm_intellagent:
    type: 'azure'

llm_chat:
    type: 'azure'
    name: 'gpt-4o-mini'
For more configuration options, refer to the configuration guide.
Step 3 - Run the Simulator
Running the Simulation
Execute the simulator using:
python run.py --config ./config/config_education.yml --output_path results/education
This command will run generate the environment dataset (if not exists) and run the simulation with the provided chatbot prompt.
Step 4 - Run the Simulator Visualization
To visualize the simulation results using streamlit, run:
cd simulator/visualization
streamlit run Simulator_Visualizer.py
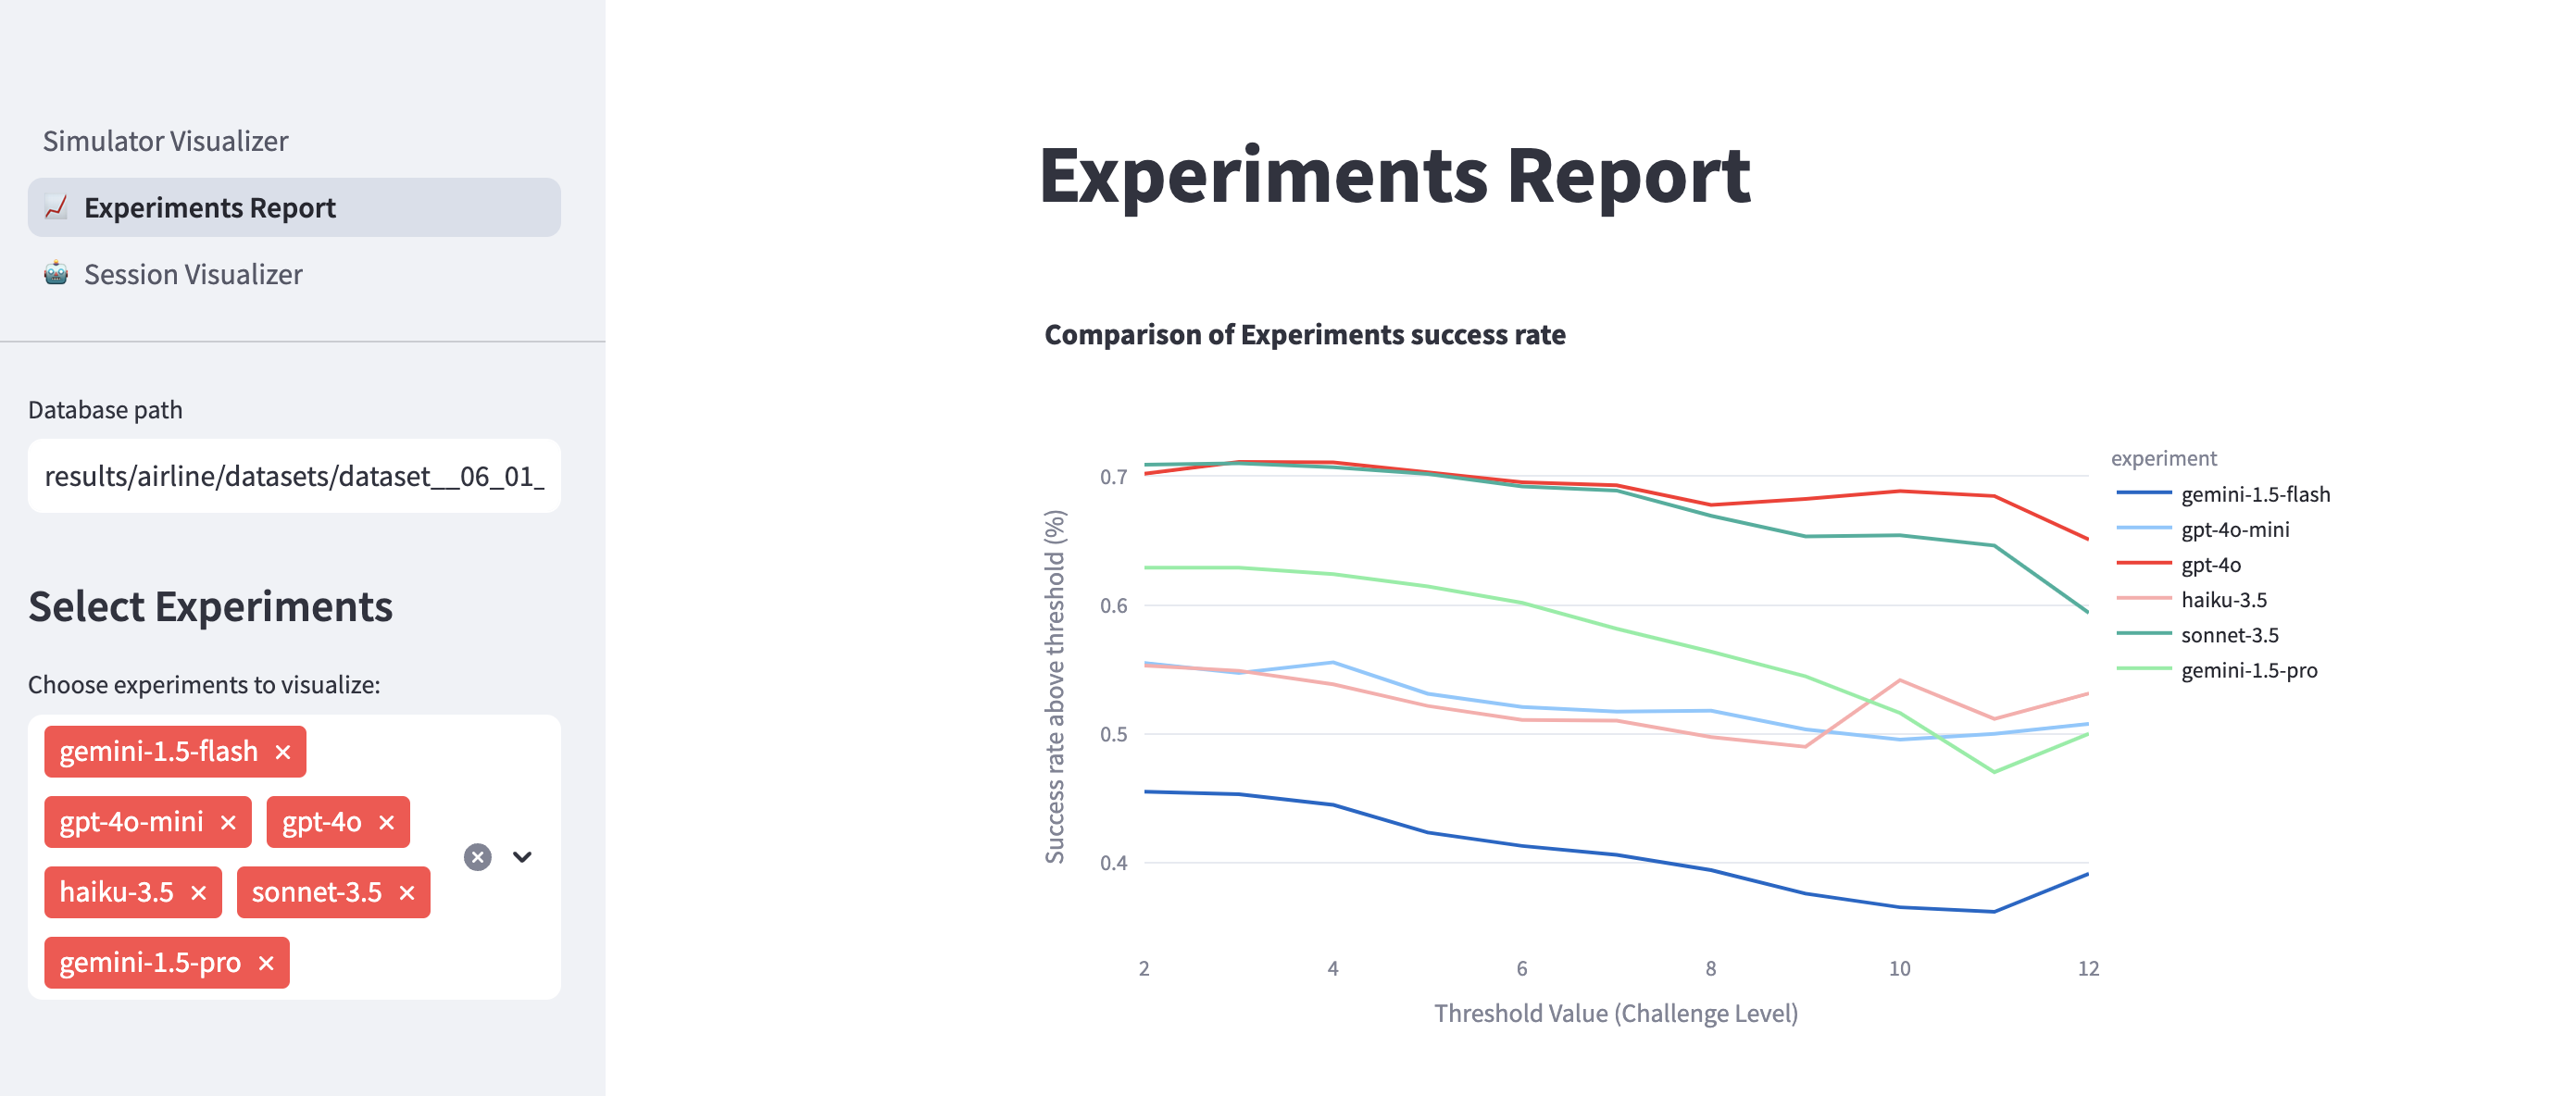
This will launch a Streamlit dashboard showing detailed analytics and visualizations of your simulation results. In the visualization you can: - Load simulator memory and experiments by providing their full path - View conversation flows and policy compliance - Analyze agent performance and failure points
Step 5 - Iterate and compare results
You can now iterate and adjust the chatbot prompt or the LLM model to evaluate changes in the chatbot's performance. Once the run is complete, you can refresh the visualization to view a comparison of all the dataset experiments.